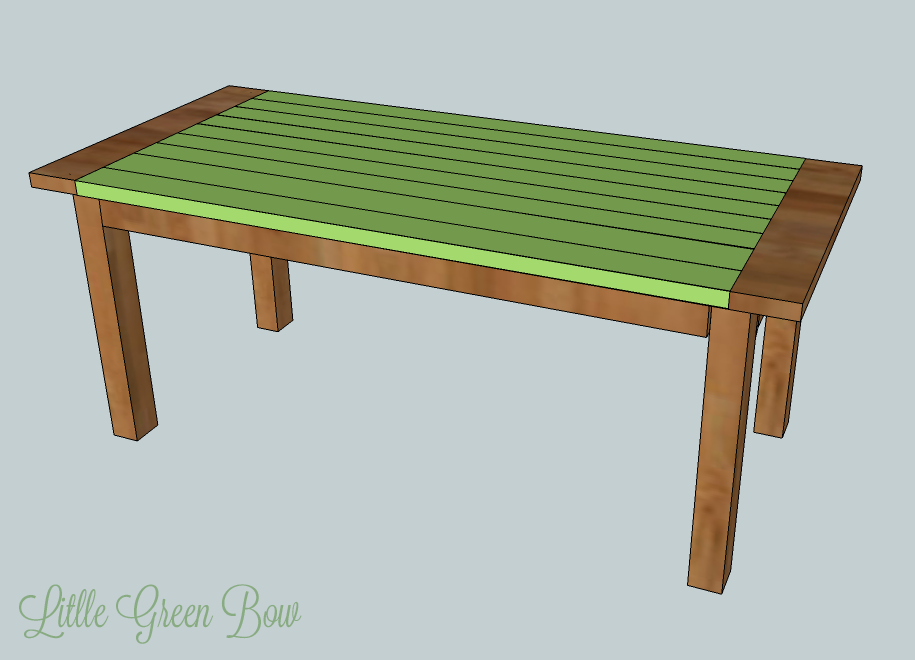
Detailed DIY Pottery Barn Dining Table Plans
Back in September, my husband and I built our very first piece of furniture. It was a dining table modeled after the Pottery Barn Hyde line. It was much easier to put together than expected and since then I have received several requests for detailed plans on how we put it together. Well, the day has finally arrived! These DIY Pottery Barn dining table plans were put together using Google SketchUp and while I tried my hardest to keep all of the measurements exact, sometimes the program just would not work with me. So please follow the measurements and do not rely solely on the photos.These plans are modified from the Tryde Coffee Table plans posted on Ana-White.Dimensions:
Supplies List:
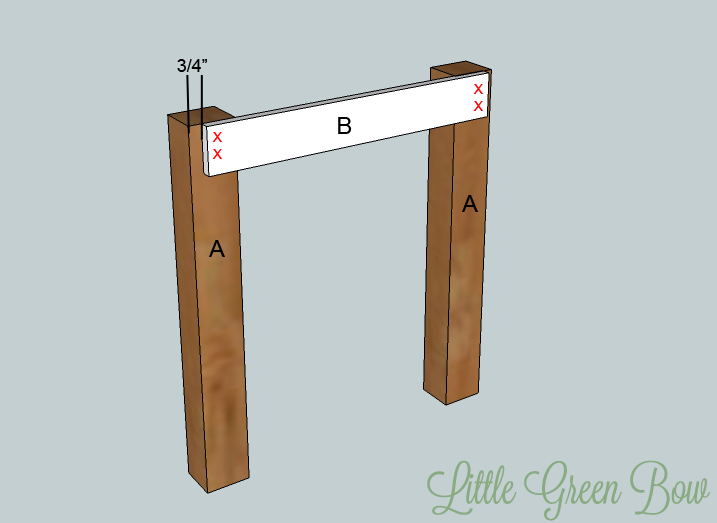
Cut out all boards except H. To get the best fit, you will measure and precisely cut out each of the boards H to fit the table. Remember, use the 2 1/2″ screws unless otherwise noted and always predrill and countersink your screws. Use glue on all joints to keep the table from separating later.Step 1: Screw the Leg Joiner (B) to the legs (A) as shown below. Do this on both sets of legs. Use the measurements below to guide you.
Step 2: Screw the side aprons (C) into the ends of the leg joiners (B) as shown below.
Step 3: Screw the end apron spacers (D) into the legs as shown below.
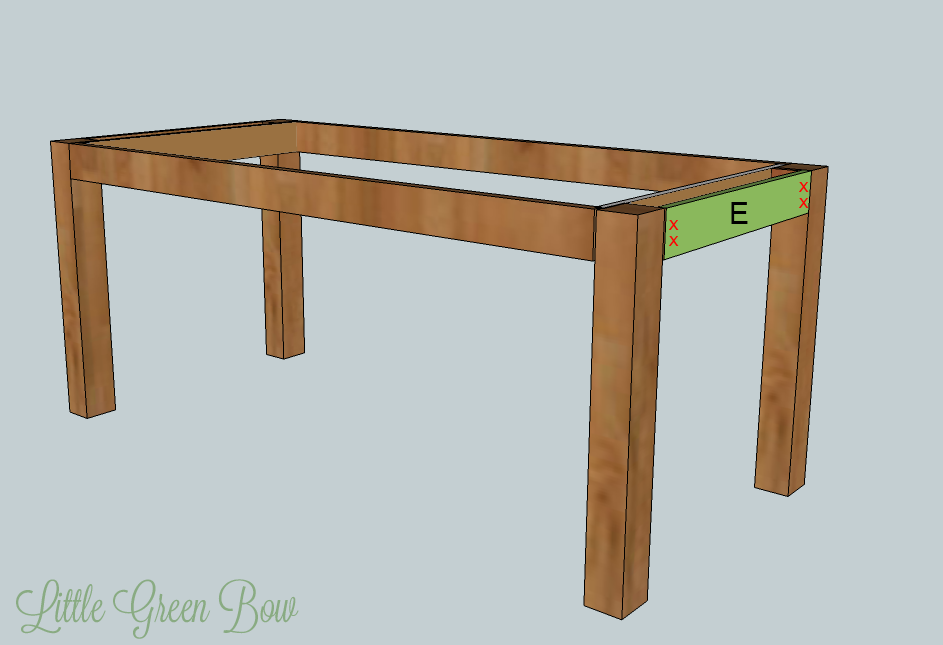
Check for square. Measure from one end diagonally across the table. Then measure on the other diagonal. If the measurements are the same, your table is square. If not, evaluate where you are off and make the necessary corrections.Step 4: Screw the end aprons (E) into the end apron spacers as shown below.
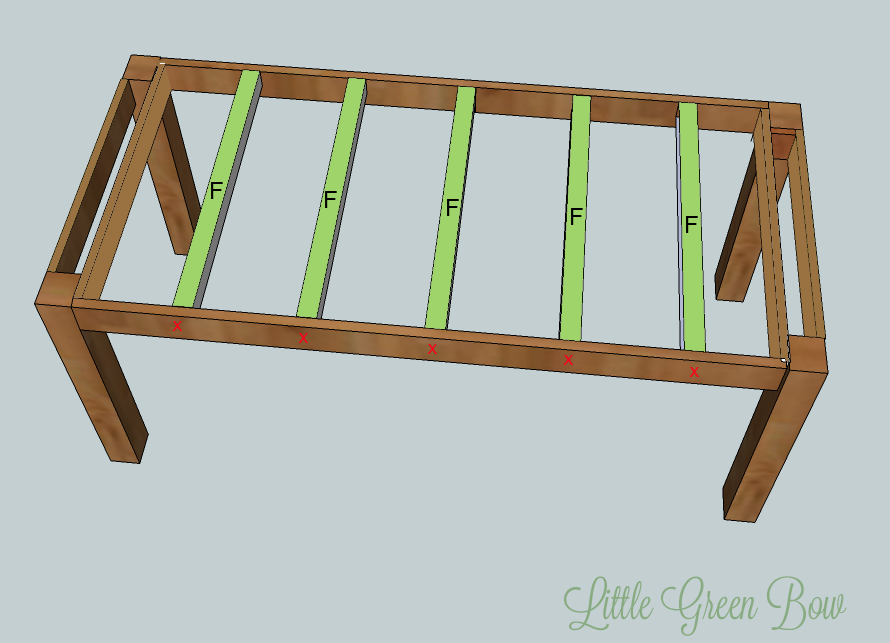
Step 5: Screw in the tabletop supports (F) as shown below, spacing the supports approx. 9″ apart.
Step 6: Now screw the breadboard ends into the tops of the legs as shown below. The edge of the breadboard is centered on the leg.
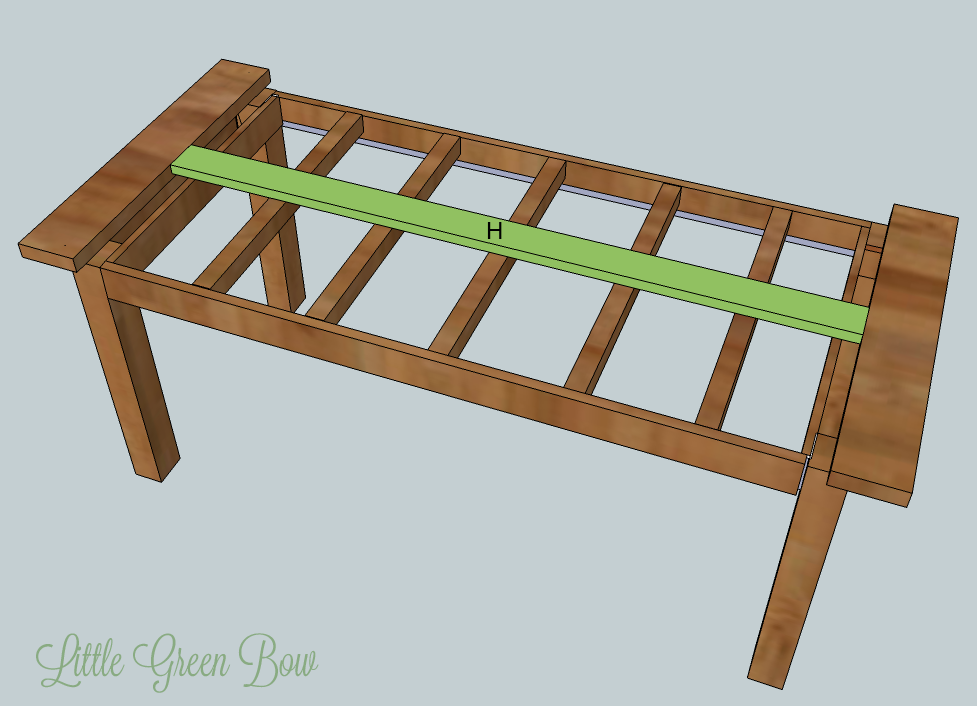
Step 7: Take a length measurement between the breadboard ends. Be very precise and cut your first tabletop board (H). Place the board with one edge centered on the table and screw in place from the bottom through the supports (F). (The board should not be centered as it appears to be in the image)
Step 8: Continue to measure and cut the tabletop boards for the top of the table. Repeat step 7. This time, make sure the edges of the tabletop boards line up. Do not leave gap between the tabletop boards. Use clamps to keep boards together.
Step 9: Stand back and admire your beautiful table. Time to send out the dinner invitations!
Our table (pictured below) was stained using Minwax in Jacobean. There are three coats of stain and three coats of polyurethane. It makes me so proud every time someone new comes over and compliments it before they know we built it.
Update: The bench plans are now available! Check them out to build your own DIY Dining Table Bench.I'm linking here:Whipperberry | Tatertots & Jello | ShabbyNest | Be Different, Act Normal | Lolly Jane Boutique | Family Ever After | The Creative Paige | 5 Days, 5 Ways | I Heart Nap Time | C.R.A.F.T | Sew Can Do | Keeping It Simple | Under the Table & Dreaming |Skip to My Lou | Nifty Thrifty Things | Petite Hermine | Home Stories A2Z | Romance on a Dime | A Bowl Full of Lemons | Homework | Tip Junkie | Lil Luna | Ginger Snap Crafts | It's Overflowing | Night Owl Crafting | The Shady Porch | Junk in Their Trunk | Uncommon | The Artsy Girl Connection | Fabulously Flawed | Delightful Order | Between U & Me | Today's Creative Blog | One Artsy Mama | Miss Mustard Seed | Classy Clutter | Decorating Insanity | Craft-O-Maniac | Goings on in Texas | Sew Chatty | The Girl Creative | Making the World Cuter | DIY Home Sweet Home | Vintage Mauve | Singing 3 Little Birds | Sugar Bee Crafts | The Creative Crate | Feathered Nest | How to Nest for Less | Mrs. Hines Class

